Bark Grafting in the Native Grove

Figure 1 (Photo by William Reid)
I’ve been grafting pecan trees for over 35 years and during that same time I’ve seen dozens of variations of what is commonly called the bark graft. This grafting method is relatively simple to accomplish and can be applied on trees above the cattle browse line. In bark grafting, the scion is inserted between the bark and wood on one side of the stock. The key to successful bark grafting is to make certain that cambium on the scion is placed in direct contact with cambium of the stock.
I start the bark graft by cutting off at least one-half of the stock leaving a stump less than 4 inches in diameter (for faster healing I prefer trees in the 1.5 to 2.5 inch diameter range) (Fig. 1). I then prepare the stock to receive a scion by using my knife to draw a straight line. Using the tip of my knife, I sliced the bark straight down the stem for about 3 inches (Fig. 2). I made sure to cut all the way through the bark so the bark can be lifted away from the wood when the scion is inserted.

Bark grafting requires that the bark “slips” easily from the wood. The bark-slipping period starts in early spring when new leaves are expanding and continues through the pollination season. However, I’ve found that the earlier a graft is applied the better that graft will perform.
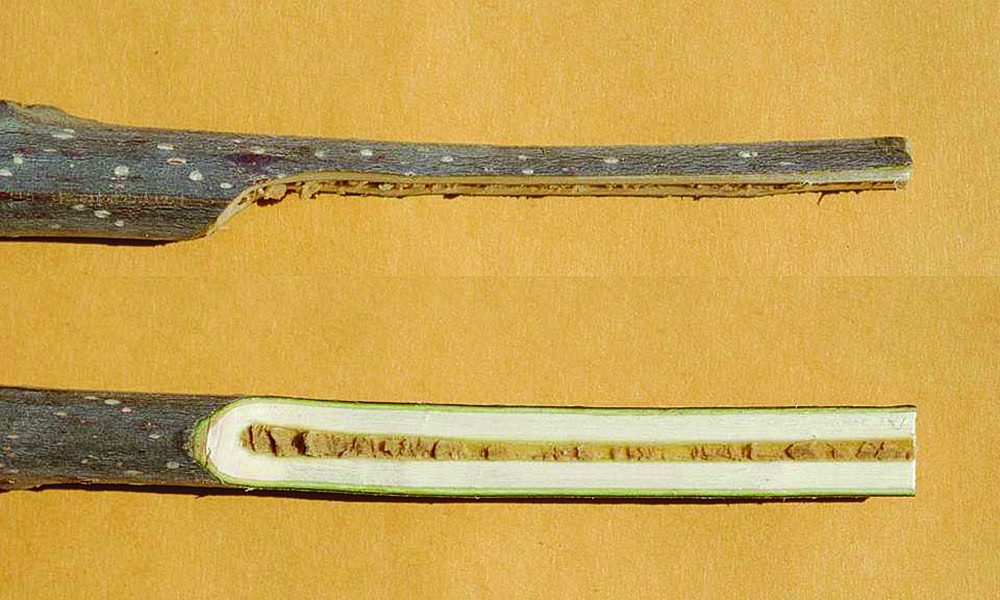
Now it is time to work on the dormant scion. The first cut I made on the scion removed about two thirds the diameter of the stick. In Fig. 3, I present 2 views of the same scion: one from the side and one side looking straight down on the cut surface. I made the cut parallel to scion except for the curved shoulder near the top of the cut. I’ll call this first cut into the scion “the deep cut”.
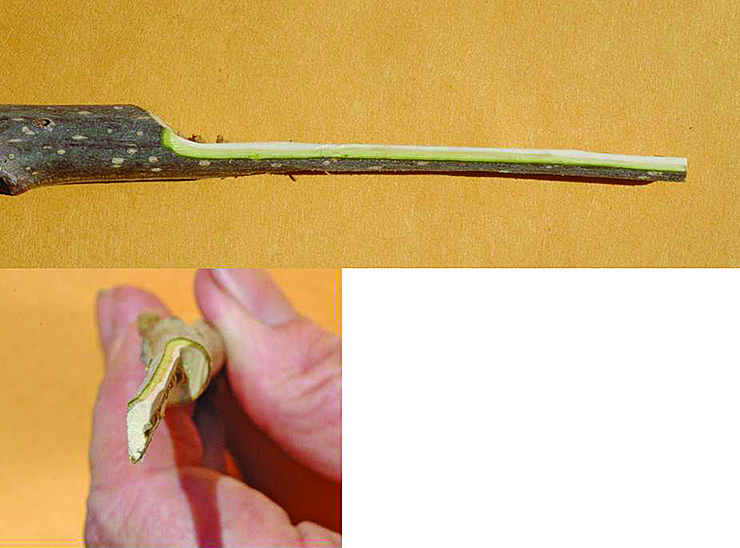
Turning the scion over, I make a shallow cut peeling off enough bark to enter into the wood. Note that I started the shallow cut below the point on the scion where I carved the shoulder of the deep cut. Fig. 4 is a composite of 3 views of the same scion. This shallow cut is made at an angle to the deep cut. In making the shallow cut, I start peeling of the bark in such a way as to leave as thin a strip of bark as possible along one edge of the scion (upper view). Turning the scion slightly, you can see a thick strip of bark on the other side of the scion (middle view). At this point my scion wood has a wedge shape when looking at it from the bottom (bottom view).
With the next cut, I expose cambium at a right angle from the deep cut (Fig. 5). I turned the scion so I was looking at the thick bark strip side of the stick. I then placed my knife at 90 degrees from the deep cut and shaved off the edge of the scion. This cut needs to be deep enough so you can see white wood all the way down the edge of the scion but not so deep as to remove all the bark from that side of the scion. After making this cut, my wood has a triangular shape when looking at the bottom of the scion (lower portion of Fig. 5).
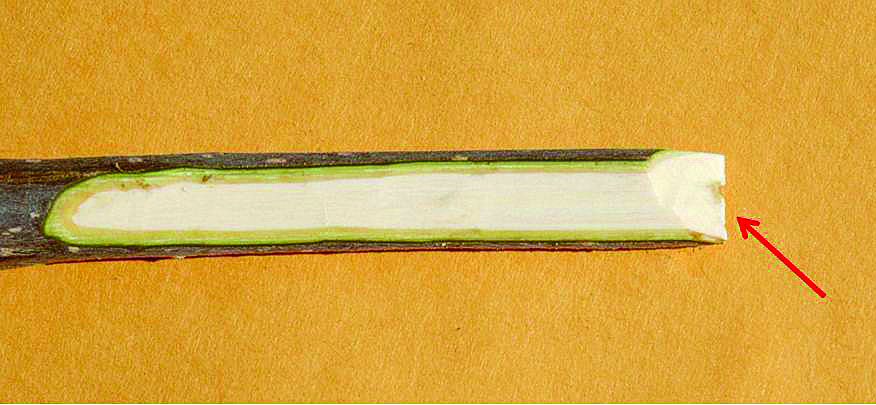
For the final cut, I created a chisel point at the end of the scion to allow easy insertion under the bark of the stock (Fig. 6). This cut (red arrow) is made on the opposite side from the deep cut. With a fully carved scion, it’s time to join scion and stock.
To insert the scion, I lifted the bark on the left side of the slice I had made into bark of the stock (Fig. 7). The deep cut is facing the wood of the stock, while the shallow cut is covered by the raised portion of the stock’s bark. Note that the 90-degree cut fits smoothly against the slice I had made in the stock’s bark.
I gently tap the scion down under the bark until the shoulder of the deep cut rests just above the wood of the stock. Note that the shallow cut is completely covered by bark (Fig. 8).
I use a light-duty staple gun with 5/16 inch staples to press and hold the bark of the stock tightly against the scion (Arrow Staple gun model JT-21M). In Fig. 9, you can see that I used four staples to hold the bark flap against the scion. I put these staples in at a 45-degree angle so that both sides of the staple are fully driven into the tree.
I added three more staples along the left side of the scion to compress the stock’s bark tightly against the scion (Fig. 10). It is very important to eliminate all air spaces between the scion and stock when grafting pecan trees. So feel free to use as many staples as it takes to bend the bark to fit around the scion.
I then cover the graft union with aluminum foil to block the sun from inhibiting callus formation (Fig. 11). The foil covers the entire top of the stock and fits tightly around the scion.

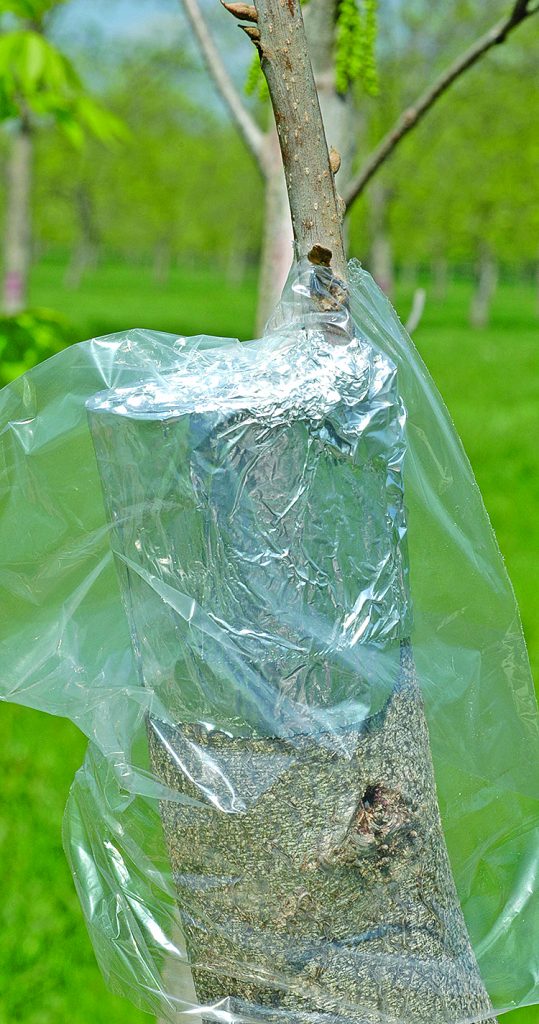
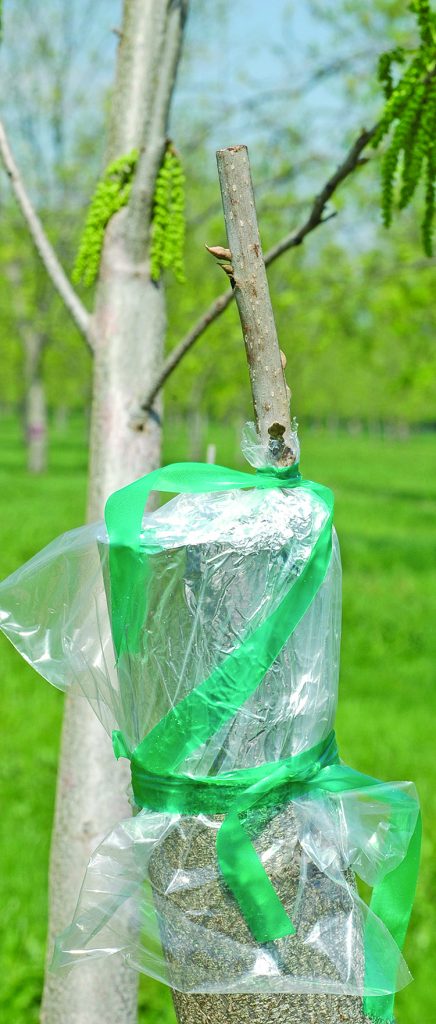
To conserve moisture around the graft union, I place a plastic bag over the aluminum foil (Fig. 12). I tear a corner out of the bag and place the bag over the scion. As I slip the bag over the scion, I make sure that I don’t injure the buds on the bud stick.
I use green grafting tape to seal the plastic bag over the graft union (Fig. 13). I first tied the bag around the scion, then at the bottom of the bag around the stock.
My next step in the grafting process is to seal the top of the scion from moisture loss with a dab of white glue (Fig. 14). At this point, the graft is complete. However, there is one more crucial and often overlooked step for ensuring grafting success.
A single scion sticking out in the open becomes a very attractive location for male meadowlarks or red-winged black birds to perch and sing their songs of romance. As small as these birds seem, they can land with enough force to break out the scion. To prevent bird damage, I attach a branch stick (cut from the removed top of the tree) to the tree using black electrical tape (Fig. 15). The end of this “bird perch” is much higher than the scion and provides a more desirable location for birds to sing their mating calls. Later in the summer, I’ll replace the bird perch with a more substantial training 5-8-foot-long stake. I tie the scion’s new growth to the stake to prevent the wind from breaking out the new graft.
